Posted 13 years ago
·
Author
This tutorial was created using PS 8. However, I have other versions such as CS3, CS4, CS5 and there is not any difference in them regarding on making the textures. So it really doesn't matter which one you choose.
1) Create a new 256×256 picture with transparent background. (File -> New)
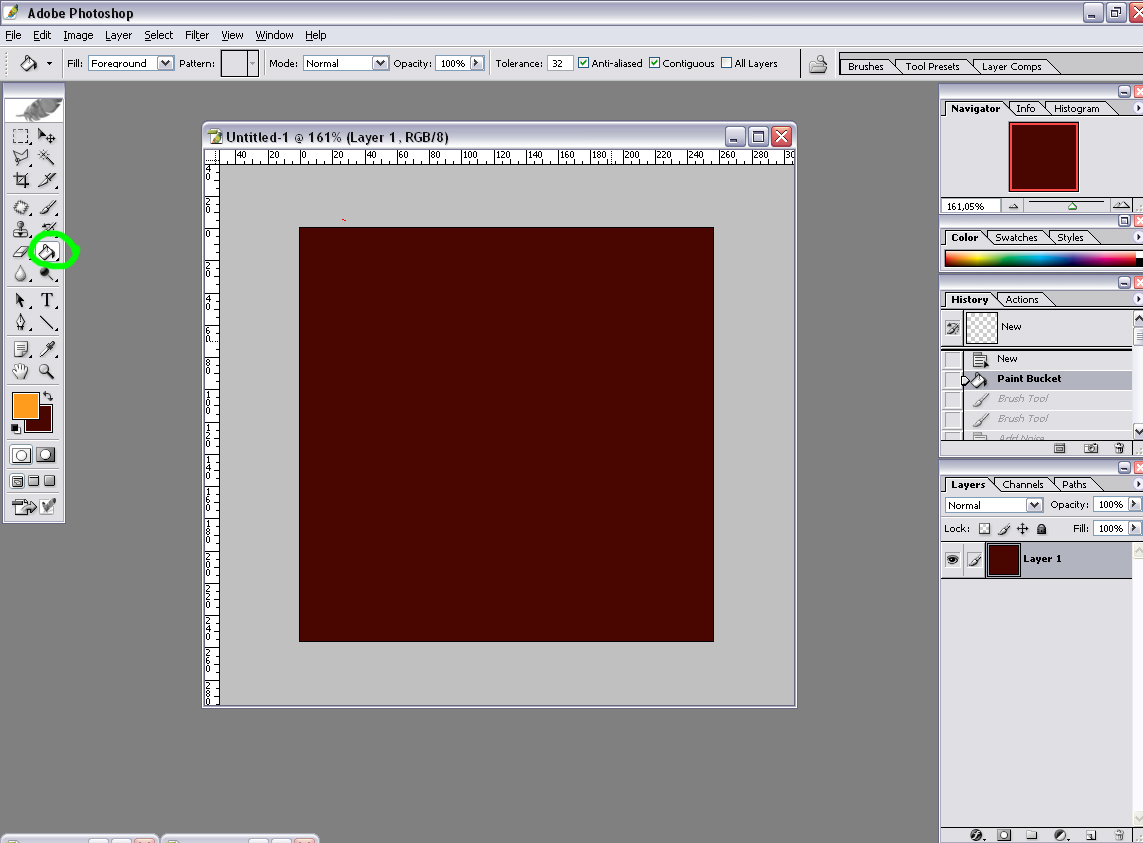
Pick a colour you want the darkest shades of your hair to have, select Bucket tool and click on your picture once.
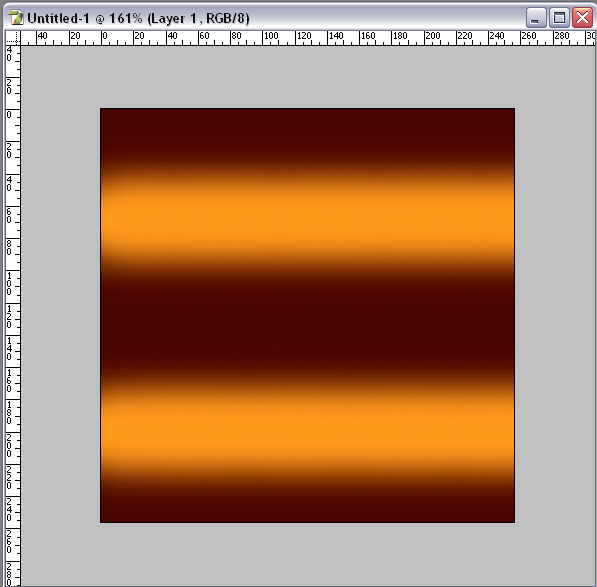
2) Now pick a colour you want the light shades of your hair to have, select Brush tool, select soft brush with the diameter around 65. Now draw 2 horizontal lines across your picture. Dont worry if it’s not entirely straight, it’s not important anyway.
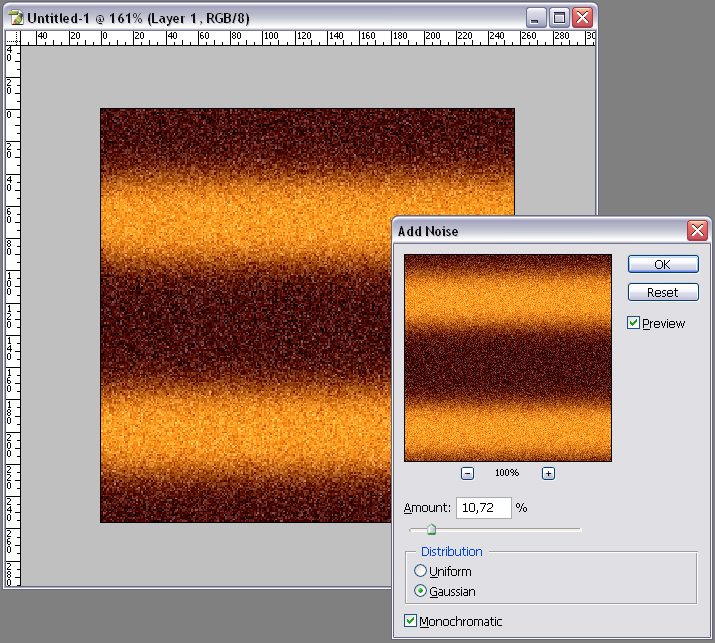
3) Go to Filter -> Noise -> Add Noise. Select Gaussian and check Monochromatic. The amount should be something around 10%. Click OK.
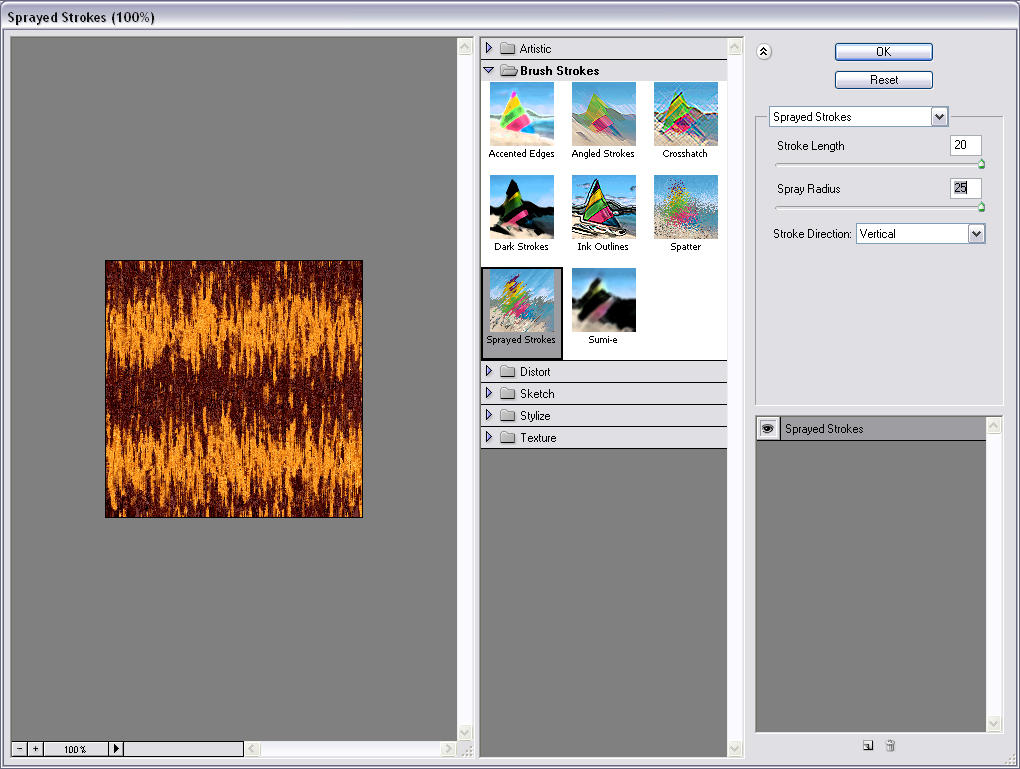
4) Now go to Filter -> Brush Strokes -> Sprayed Strokes. Set Stroke Length to 20 (max), Spray Radius to 25 (max), Stroke Direction to Vertical, hit OK.
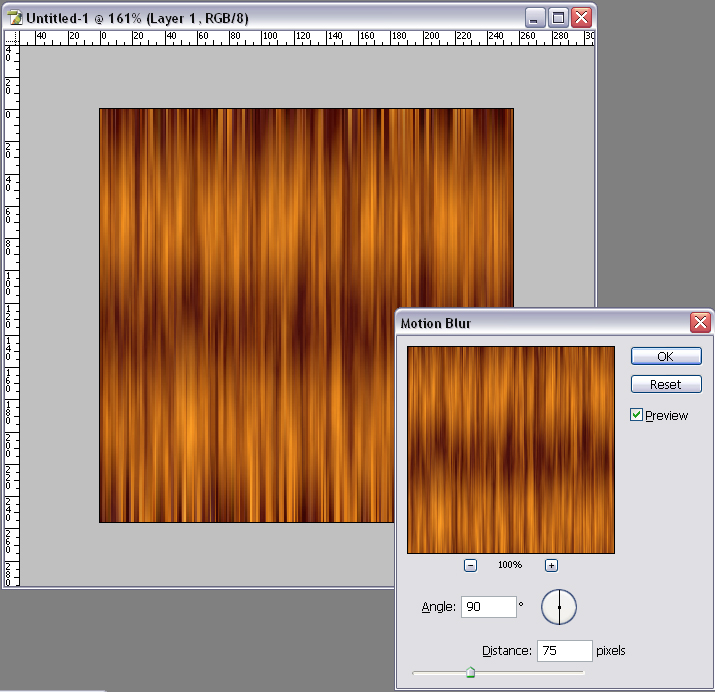
5) Go to Filter -> Blur -> Motion Blur. Set Angle to 90, Distance to something like 75 pixels, and hit OK. Now it’s looking more like it.
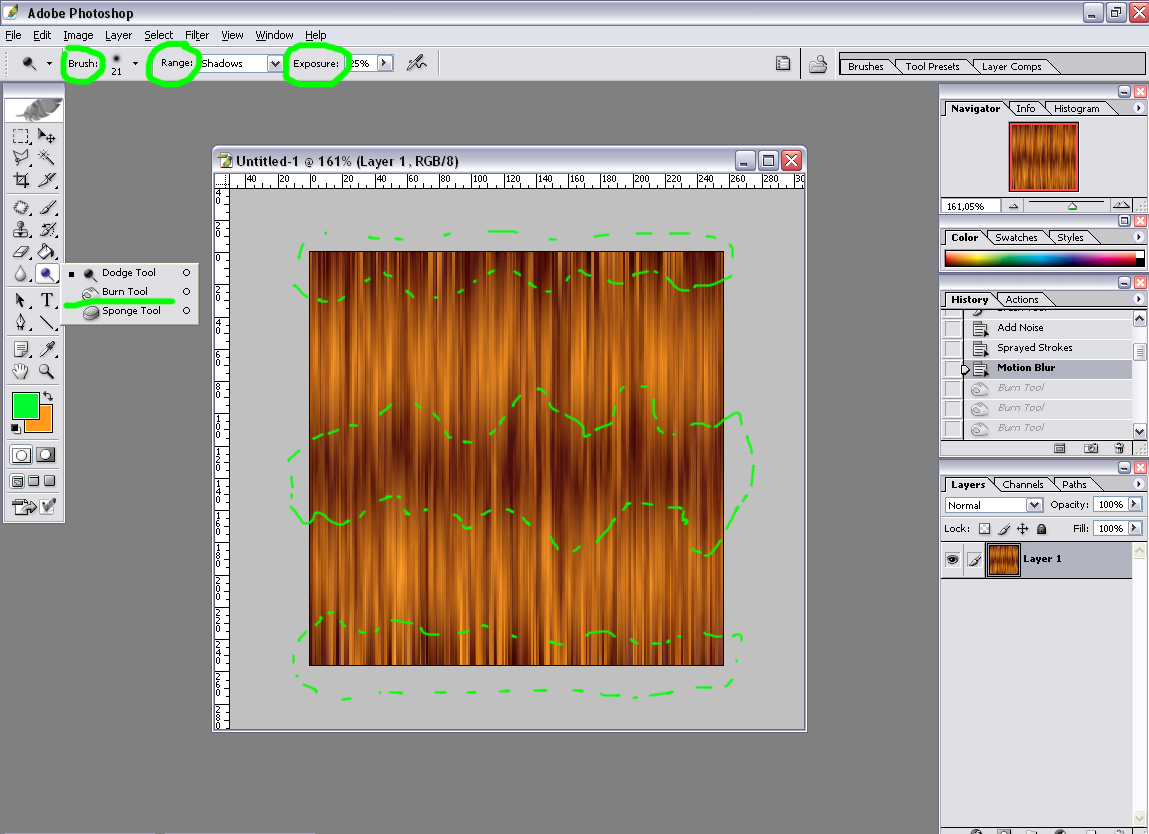
6) Now we are going to enhance the highlights and the shadows of our hair to make it look more realistic. Select Burn Tool, select brush diameter around 45, set Range to Midtones, set Exposure to around 8-10%. Then paint around the darkest parts of your picture with a few brush strokes (on the picture below the area indicated with dotted green line). Remember: the longer you keep the mouse button pressed while drawing over the same area, the darker the painted area gets.
7) To enhance the highlights, select Dodge Tool. Select brush diameter around 35, set Range to Highlights, set Exposure to 8%. Then paint around the lightest parts of your hair with the few brush strokes (on the picture below the area is indicated with dotted green line). Dodge Tool works just like the Burn Tool: the longer you keep the mouse button pressed while drawing over the same area, the lighter the painted area gets. So don’t overdo it
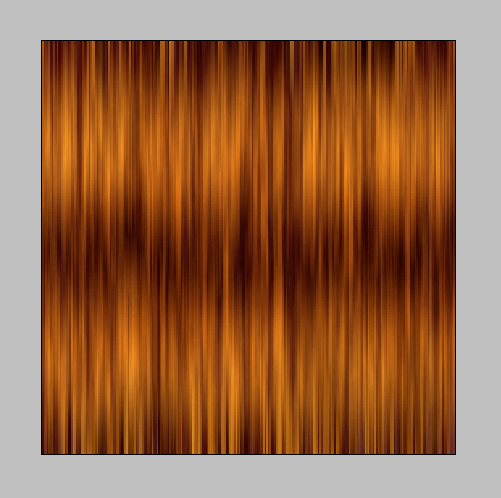
 Quite neat, huh Now you can save it as a TGA file, or as JPG, it doesnt matter here, as long as this pictures doesn’t have the alpha channel or any transparency in it.
Ok, now you have the texture for the strands of hair somewhere in the middle of your hair style. But for the more natural look you will also have to to have hair strands with more defined hair ends. That’s why we’re going to add an alpha channel to our hair texture, with the defined hair ends. However this is not needed. It is definitely up to you to use it or no.
1) So far we didnt have any alpha channel in our texture. Now we’re going to create it. Go to the Channels tab and press New Channel button to create a new alpha channel. The new channel automatically gets selected and your beautiful hair texture goes black Dont be afraid, now you’re going to be working in the alpha channel
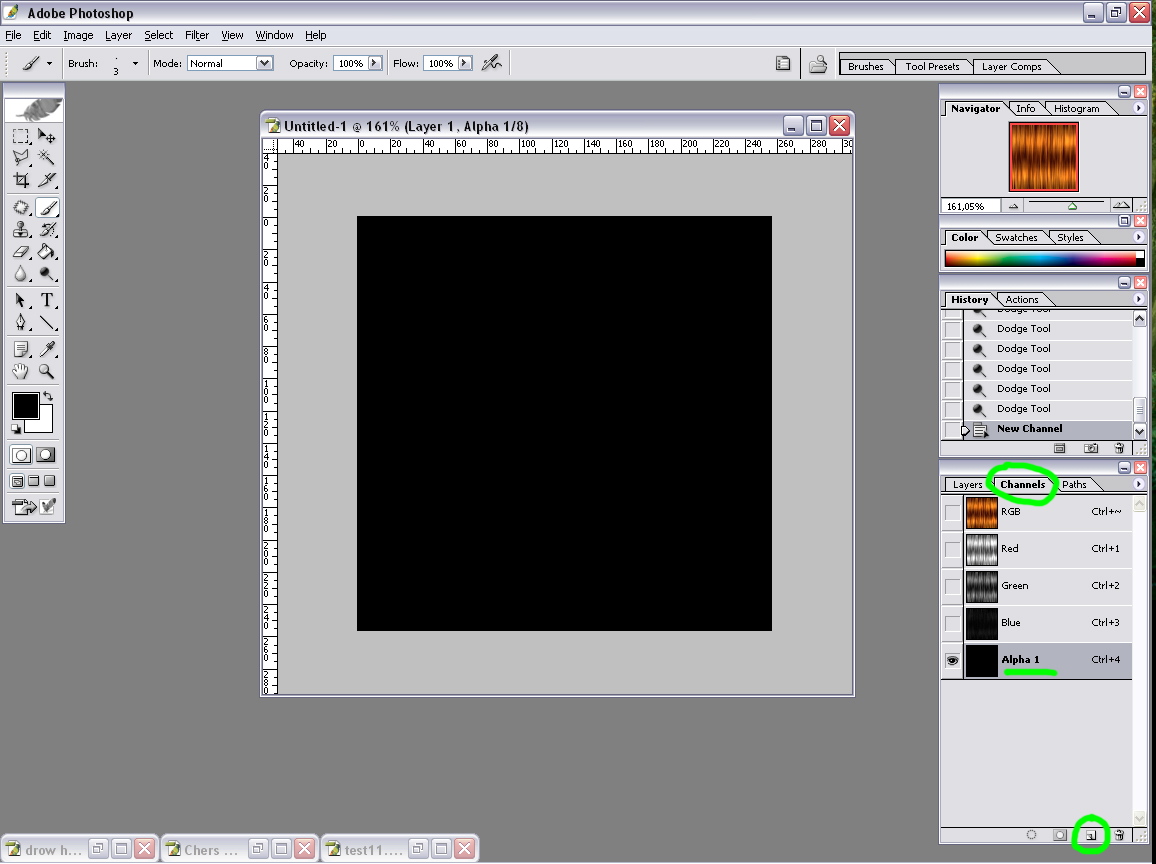
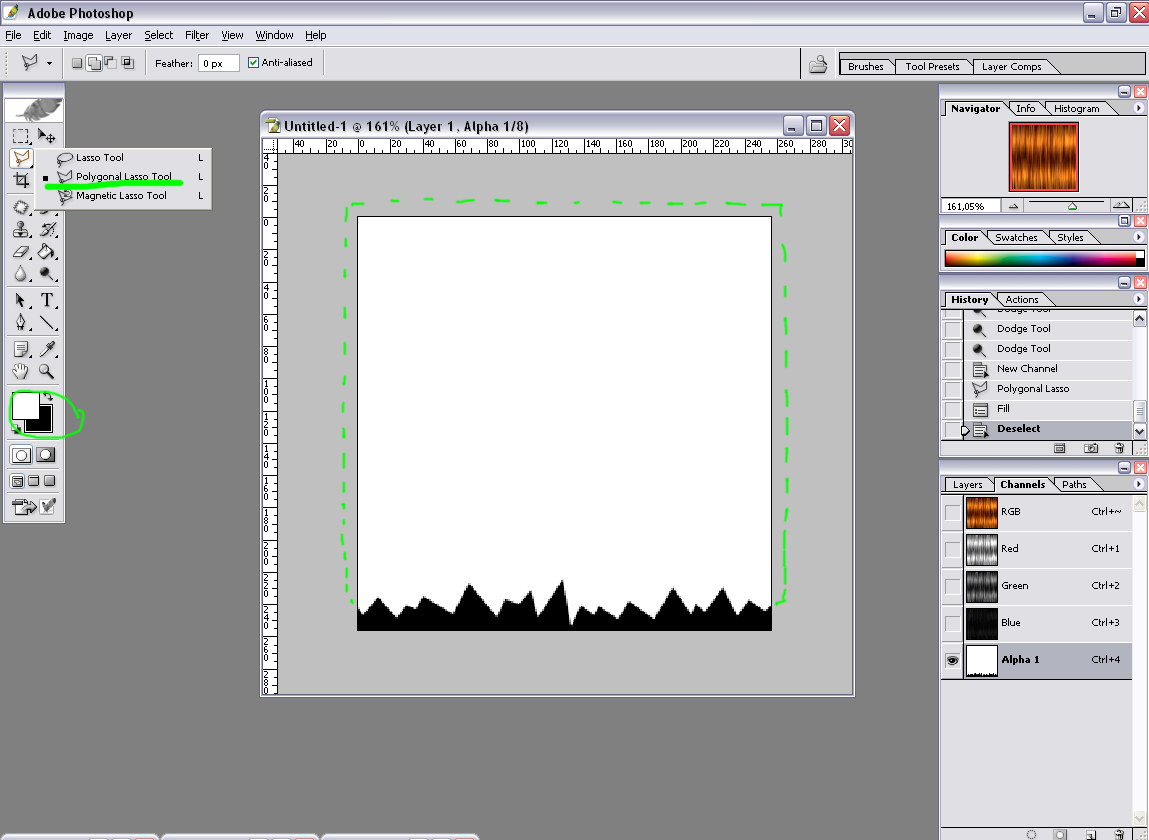
2) Still in alpha channel, select Polygonal Lasso Tool. Now make a selection, something like on the picture below (white area + green dotted line), make sure your foreground colour is white, hit Shift+F5 with the selection still active, and select Foregrond Colour and hit OK. It should fill your selection with white and you should get something like on the picture below. Dont forget to press Ctrl+D after that, to deselect all.
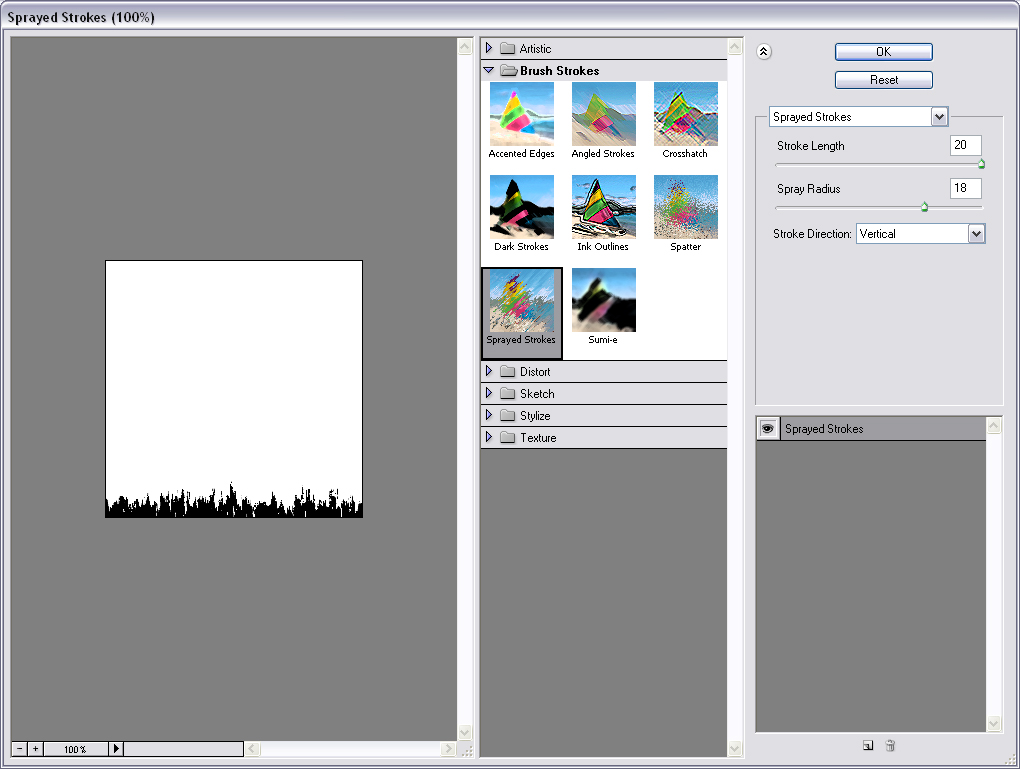
3) Still in the alpha channel, go to Filter -> Brush Strokes -> Sprayed Strokes. Set Stroke Length to 20 (max), Spray Radius to 18, Stroke Direction to Vertical, and hit OK.
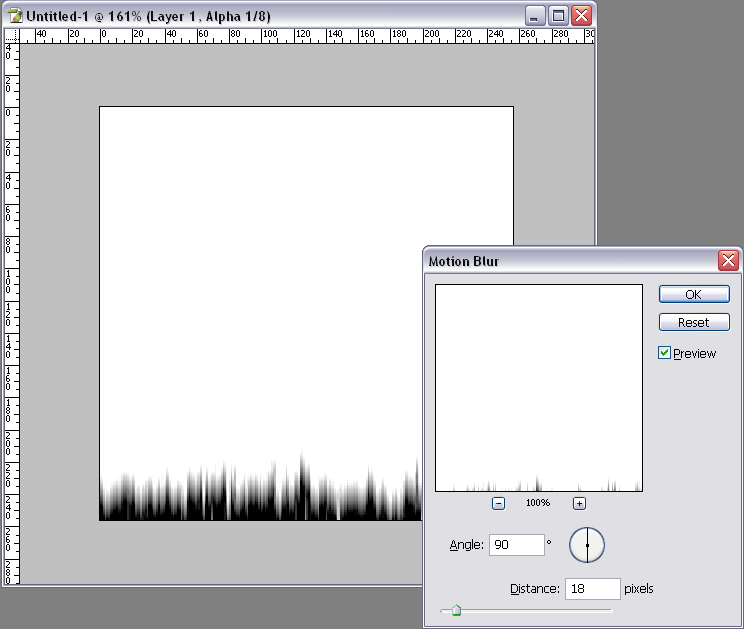
4) Still with the alpha channel active, go to Filter -> Blur -> Motion Blur. Set Angle to 90, Distance to something like 18-20 pixels, and hit OK.

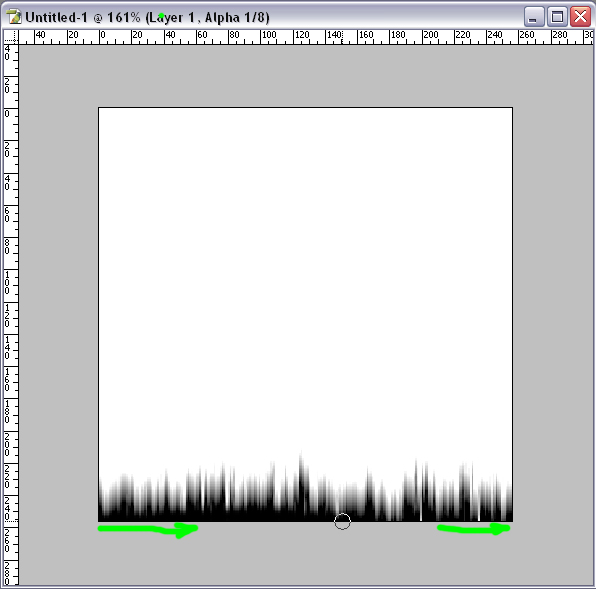
5) Now, select Brush tool, soft brush around 13 pixels, and draw a line along the lower edge of the picture, to clean it up: to make sure it’s all black, and there are no white pixels left on the lower edge, we want to make the lowest edge completely transparent.
6) Now you’re actually all done so you can skip this step if you really want to. However, if you’re a perfectionist like me, you might probably want to do one last step: Select Dodge Tool again, set Brush to around 15 pixels, Set Range to Shadows, set Exposure to 25%. And paint over the highest peaks of black to make them fade even more smoothly into white (green dotted area on the picture below).
7) Now you just have to save your texture as a 32 bits TGA file with another name than your first hair texture. And thats it
Hopefully this tutorial was helpful. Enjoy.
1) Create a new 256×256 picture with transparent background. (File -> New)
Pick a colour you want the darkest shades of your hair to have, select Bucket tool and click on your picture once.

2) Now pick a colour you want the light shades of your hair to have, select Brush tool, select soft brush with the diameter around 65. Now draw 2 horizontal lines across your picture. Dont worry if it’s not entirely straight, it’s not important anyway.

3) Go to Filter -> Noise -> Add Noise. Select Gaussian and check Monochromatic. The amount should be something around 10%. Click OK.

4) Now go to Filter -> Brush Strokes -> Sprayed Strokes. Set Stroke Length to 20 (max), Spray Radius to 25 (max), Stroke Direction to Vertical, hit OK.

5) Go to Filter -> Blur -> Motion Blur. Set Angle to 90, Distance to something like 75 pixels, and hit OK. Now it’s looking more like it.


6) Now we are going to enhance the highlights and the shadows of our hair to make it look more realistic. Select Burn Tool, select brush diameter around 45, set Range to Midtones, set Exposure to around 8-10%. Then paint around the darkest parts of your picture with a few brush strokes (on the picture below the area indicated with dotted green line). Remember: the longer you keep the mouse button pressed while drawing over the same area, the darker the painted area gets.

7) To enhance the highlights, select Dodge Tool. Select brush diameter around 35, set Range to Highlights, set Exposure to 8%. Then paint around the lightest parts of your hair with the few brush strokes (on the picture below the area is indicated with dotted green line). Dodge Tool works just like the Burn Tool: the longer you keep the mouse button pressed while drawing over the same area, the lighter the painted area gets. So don’t overdo it

 Quite neat, huh Now you can save it as a TGA file, or as JPG, it doesnt matter here, as long as this pictures doesn’t have the alpha channel or any transparency in it.
Ok, now you have the texture for the strands of hair somewhere in the middle of your hair style. But for the more natural look you will also have to to have hair strands with more defined hair ends. That’s why we’re going to add an alpha channel to our hair texture, with the defined hair ends. However this is not needed. It is definitely up to you to use it or no.
1) So far we didnt have any alpha channel in our texture. Now we’re going to create it. Go to the Channels tab and press New Channel button to create a new alpha channel. The new channel automatically gets selected and your beautiful hair texture goes black Dont be afraid, now you’re going to be working in the alpha channel

2) Still in alpha channel, select Polygonal Lasso Tool. Now make a selection, something like on the picture below (white area + green dotted line), make sure your foreground colour is white, hit Shift+F5 with the selection still active, and select Foregrond Colour and hit OK. It should fill your selection with white and you should get something like on the picture below. Dont forget to press Ctrl+D after that, to deselect all.

3) Still in the alpha channel, go to Filter -> Brush Strokes -> Sprayed Strokes. Set Stroke Length to 20 (max), Spray Radius to 18, Stroke Direction to Vertical, and hit OK.

4) Still with the alpha channel active, go to Filter -> Blur -> Motion Blur. Set Angle to 90, Distance to something like 18-20 pixels, and hit OK.

5) Now, select Brush tool, soft brush around 13 pixels, and draw a line along the lower edge of the picture, to clean it up: to make sure it’s all black, and there are no white pixels left on the lower edge, we want to make the lowest edge completely transparent.

6) Now you’re actually all done so you can skip this step if you really want to. However, if you’re a perfectionist like me, you might probably want to do one last step: Select Dodge Tool again, set Brush to around 15 pixels, Set Range to Shadows, set Exposure to 25%. And paint over the highest peaks of black to make them fade even more smoothly into white (green dotted area on the picture below).

7) Now you just have to save your texture as a 32 bits TGA file with another name than your first hair texture. And thats it
Hopefully this tutorial was helpful. Enjoy.


 ANYWAY, long story short, I am here now and read through this tutorial. I'm amazed at the results and the simplicity of the directions. THANK YOU for an awesome tutorial. Onward I go in learning...