Posted 7 years ago
·
Author
How To Make A Realistic Wall
In this tutorial you will learn how to make basic and easy Crown Molding, Baseboards and Rail on a simple wall. There are various ways to do this in photoshop. This is not the only way and may not even be what some consider the best way but it is a way that works and is simple to accomplish. As usual all colors and any numbers used to create this tutorial can and probably should be played around with to find the results you like best. This was not made to be pretty, its made you show you how to make a better wall texture.
I have used this many times, and have perfected it in my own ways to the point where I do this completely differently. I'm sure you will do the same once you play around with it and get used to the general workings of photoshop.
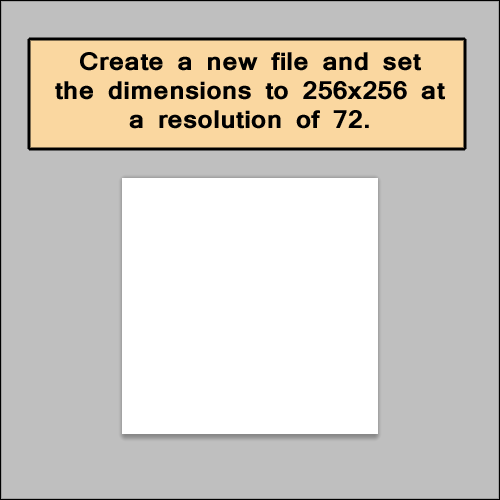
Tip: I personally don't set low resolutions for better quality. If it is to big I might lower it later.
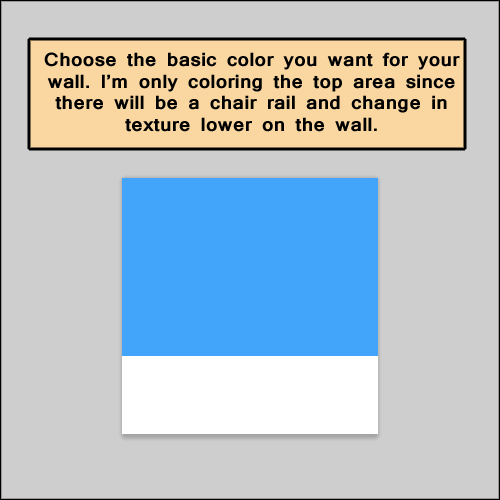
Tip: The color used here is a bright blue, go light grey and its easier on your eyes.
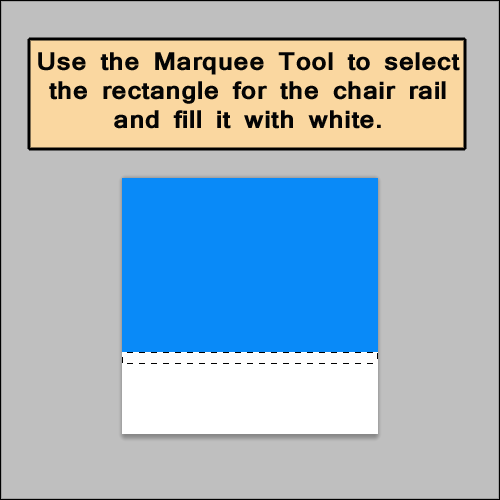
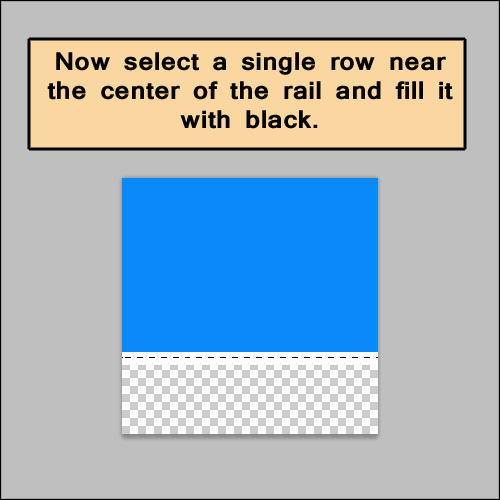
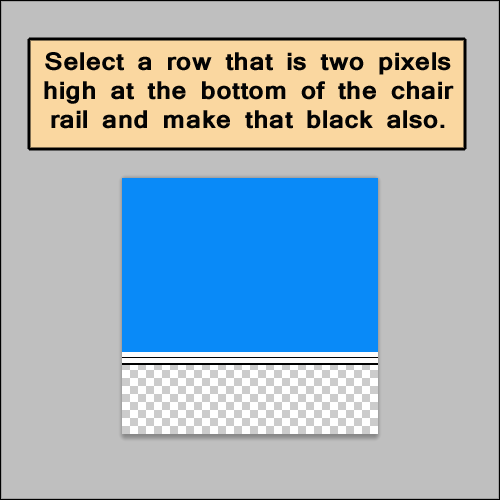
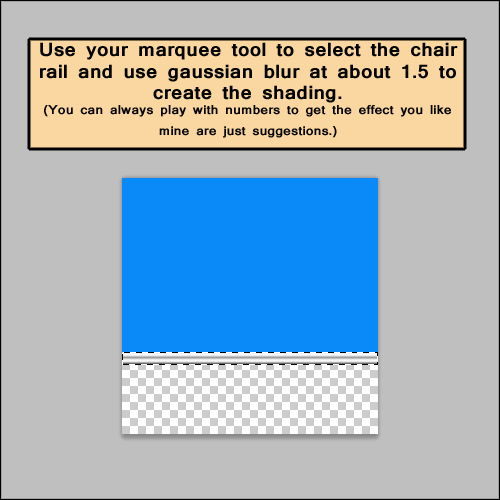
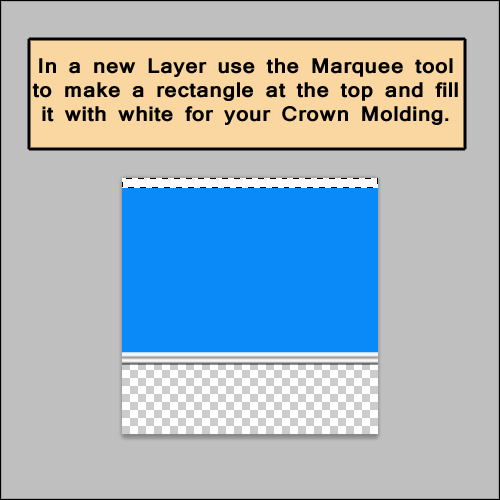
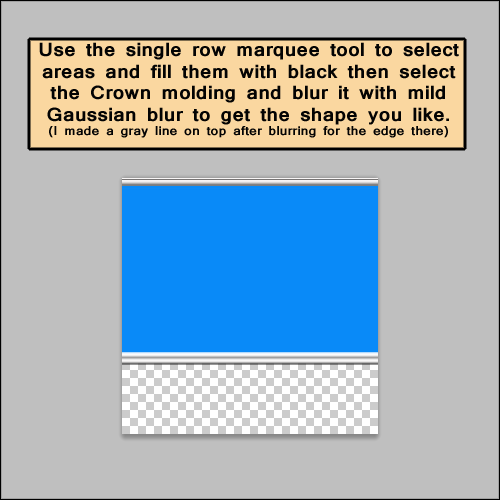
Tip: The black lining is very effective. I recommend that you also play around with it using layers and inner shadows and/or drop shadows as well. You can also practice making rails and moldings in a separate file so you can have it and apply it to any future wall of your choosing. It makes life easier, trust me.
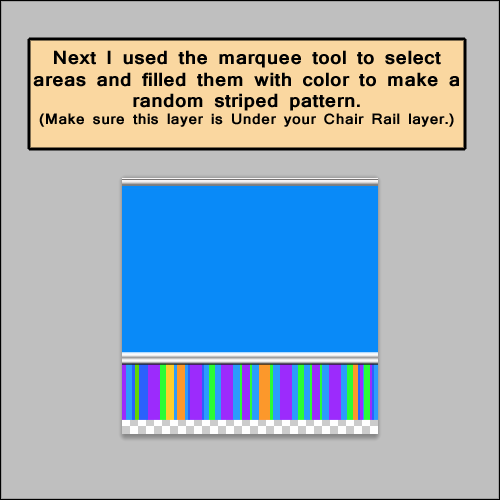
Tip: Get fancy with this please, the pic is simple but use your imagination. You can put damask, wood, fancy photoshop patterns, the list is endless. Same goes for the base wall, add texture so that is not a flat boring wall.
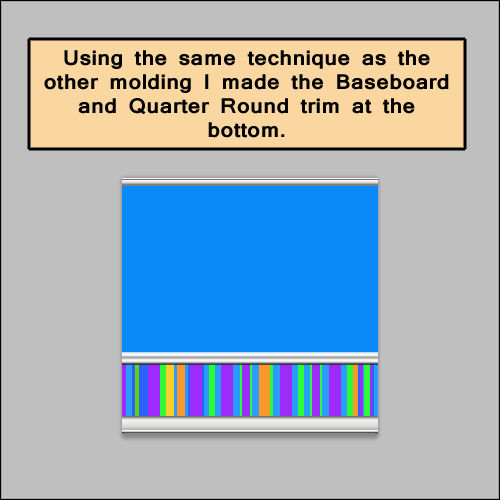
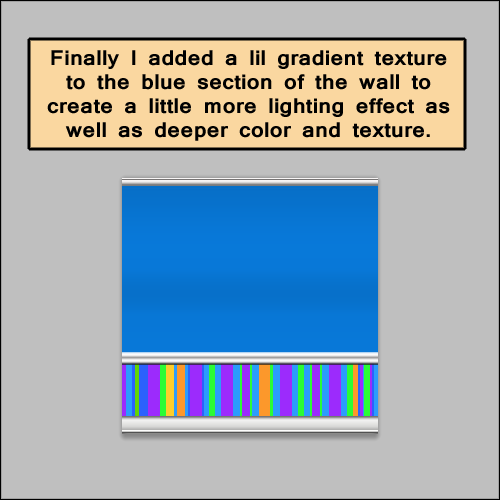

You could make many variations on this. Such as wallpaper on the top wall and wood panel below the chair rail or skip the chair rail altogether and just create wall paper between the crown and base boards. Make wood panels between them. Maybe even make a tiled wood grain on the molding itself. There are no limits, the molding could have many more shadows creating a much more complex molding ... they could be wider or more narrow. BE CREATIVE!!!!
In this tutorial you will learn how to make basic and easy Crown Molding, Baseboards and Rail on a simple wall. There are various ways to do this in photoshop. This is not the only way and may not even be what some consider the best way but it is a way that works and is simple to accomplish. As usual all colors and any numbers used to create this tutorial can and probably should be played around with to find the results you like best. This was not made to be pretty, its made you show you how to make a better wall texture.
I have used this many times, and have perfected it in my own ways to the point where I do this completely differently. I'm sure you will do the same once you play around with it and get used to the general workings of photoshop.

Tip: I personally don't set low resolutions for better quality. If it is to big I might lower it later.

Tip: The color used here is a bright blue, go light grey and its easier on your eyes.


Tip: The black lining is very effective. I recommend that you also play around with it using layers and inner shadows and/or drop shadows as well. You can also practice making rails and moldings in a separate file so you can have it and apply it to any future wall of your choosing. It makes life easier, trust me.

Tip: Get fancy with this please, the pic is simple but use your imagination. You can put damask, wood, fancy photoshop patterns, the list is endless. Same goes for the base wall, add texture so that is not a flat boring wall.


You could make many variations on this. Such as wallpaper on the top wall and wood panel below the chair rail or skip the chair rail altogether and just create wall paper between the crown and base boards. Make wood panels between them. Maybe even make a tiled wood grain on the molding itself. There are no limits, the molding could have many more shadows creating a much more complex molding ... they could be wider or more narrow. BE CREATIVE!!!!


